The playlist editor is used for arranging tracks created in the track editor into a cohesive musical piece. The playlist editor is also used to control the play times and render your project to a full CSD file or to render the score of your project into a full score file.
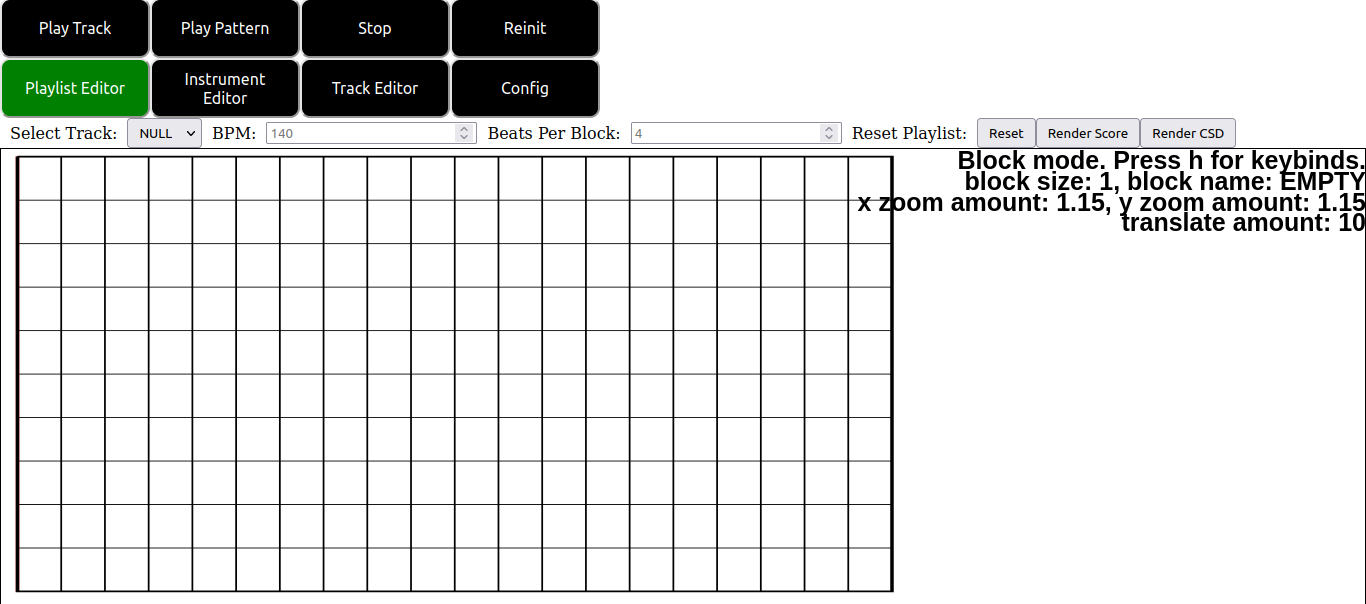
On clicking the playlist editor tab button at the top of the screen you are presented with the following user interface:
The controls above the playlist canvas shown in this image are as follows:
Below the buttons at the top of the screen is the playlist canvas. Note that the playlist canvas operates very similarly to the pianoroll canvas, but with some essential differences. Importantly, the playlist canvas is also a modal editor, though with different modes from the playlist canvas. Notice that in the top right of the display some basic status info is displayed in the canvas, including the current mode of the canvas as well as how to access a list of important keybinds via the h key. Pressing the h key yields the following menu.
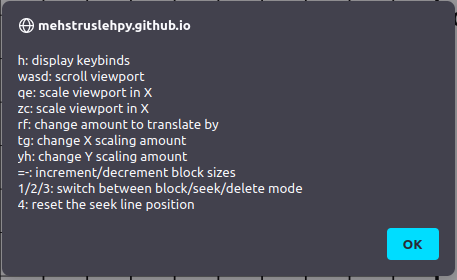
These keybinds are as follows:
The basic modes of the editor are as follows.
Note that placing blocks in the playlist editor is distinct from in the pianoroll editor in particular. Firstly, you cannot drag to change the lengths of tracks. Lengths of tracks are determined by the configuration values mentioned here and in the track editor as well as the length of the track you created. Thus these are determined by the length of track you select in the “Select Track:” dropdown rather than by any mouse movement. Secondly, blocks are not allowed to overlap. Trying to place one block on another such that the two blocks overlaps causes the new block to not be placed. Thirdly blocks can be moved after being placed as explained above.
Note also that blocks can be placed outside of the drawn boundaries of the canvas, though placing blocks to the left of the left boundary of the canvas will result in undefined behavior and possible crashing.
Below we show a sample playlist with sever patterns and modified seek position for playback part way into the song being worked on.
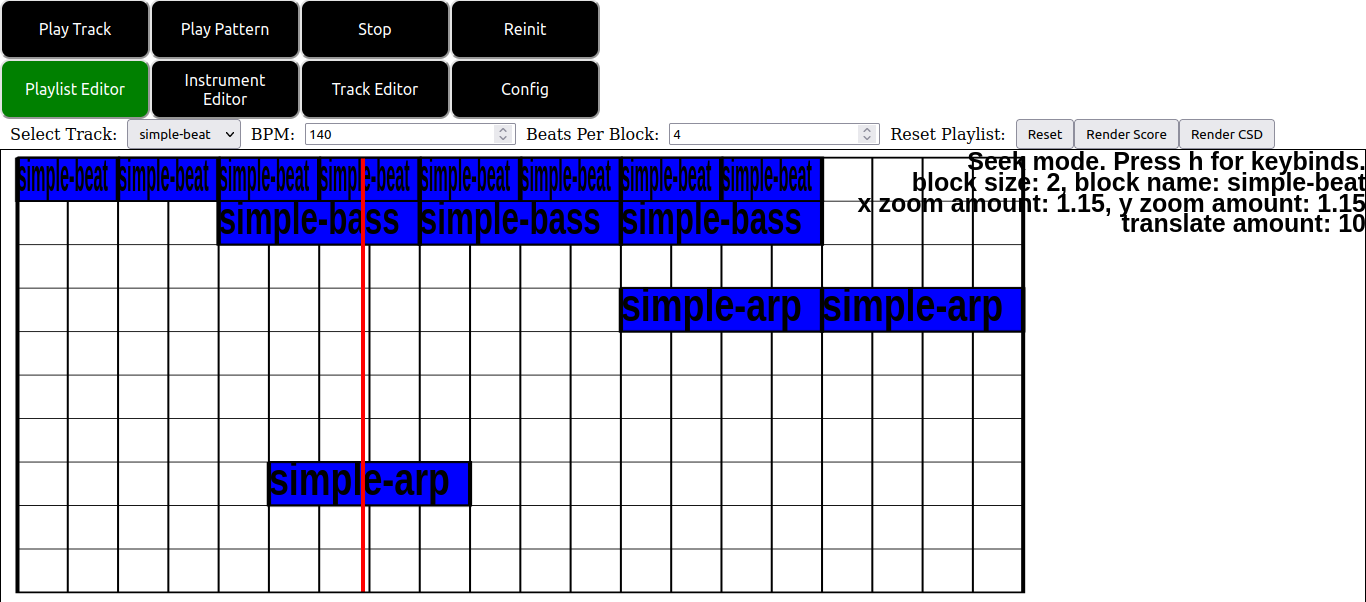
The resulting csd file of this score plays back the above patterns with appropriate offsets relative to their positions in the playlist canvas editor display. Additionally the resulting csound file has an offset setup to indicate that playback should occur at the time indicated by the red seek bar shown in the window.
Note that placing the seek bar to the left of the left boundary of the playlist editor will result in undefined behavior and possible crashing.
Try to recreate the sample project DrumBassArp.zip included with the csound source code by hand. Try to playback the audio from various positions by editing the seek position and pressing the “Play Track” button at the top of the display.